
Cleaning the DVD drive
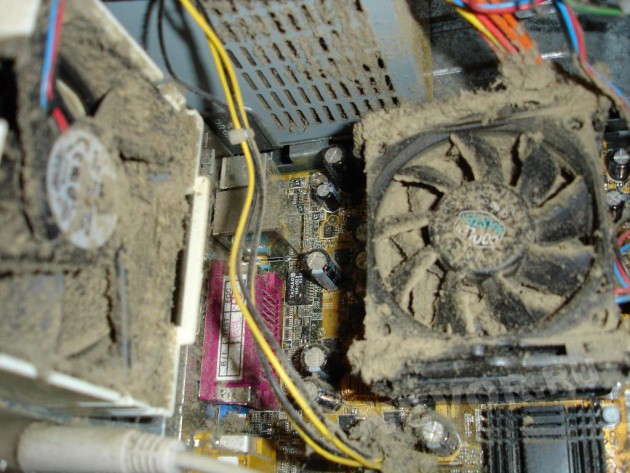
 As I wrote earlier in other articles, the biggest problem for a computer is dust. It clogs wherever possible in such quantities that sometimes you are simply amazed. An optical DVD drive is no exception.
Dust, if the device is not cleaned, affects the operation of the drive tray, reduces the accuracy of the laser mechanism and affects the quality of the pressure mechanics. In general, a DVD drive needs to be cleaned at least once a year. Optimal – once every six months.
You will need lubrication, cotton buds and alcohol to clean and maintain the DVD drive. After removing the DVD-drive from the system unit, you must remove its front panel. First of all, it is necessary to extend the drive tray. This is done with any long and thin object (needles, paper clips, piece of wire 3 cm long).
On the front panel of any DVD-drive there is a small hole (item 2 in the bottom photo). Behind it (on the inside of the panel) is the manual tray opening mechanism. It is necessary with a little effort to press on this mechanism through the hole and the tray will extend 1-2 centimeters, after which it can be manually extended to the end.
Next, remove the dust cover from the tray. To do this, turn the drive over and, bending the cover with your fingers, pull it down. On the cover, as a rule, there are two latches (item 1 in the bottom photo) and two guides on which the cover is held. She is removed without much effort.
removing the cover from the tray
Next, you need to recess the latches on the front panel. There are usually four (two from the bottom, two on the sides), or five (two on the sides, three from the bottom). After removing the front panel, unscrew the bolts (4 or 5 pieces) on the bottom cover of the DVD drive and the cover is removed.
disassembly of the drive housing
Then you need to take the DVD drive by the top cover and shake it slightly. The plastic drive mechanism will fall out of the top cover (see photo below). After removing the covers, the optical disc tray itself is removed. It extends to the stop, then the tabs located on the back of the tray at the corners (see photo below) are unbent and the tray is removed.
disassembly of the drive housing
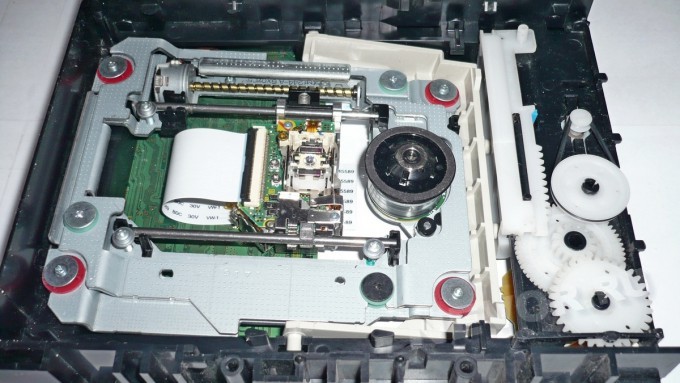
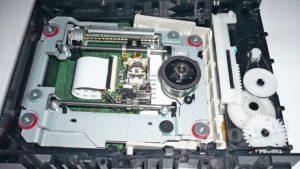
All spare parts from the DVD-drive are removed, you can proceed with cleaning. The main body of the DVD drive has many recesses, grooves and indentations. They must be thoroughly purged to remove dust. Even a small amount of it at the back wall or in the grooves of the tray can lead to the fact that the tray stops opening (closing).
DVD drive with cover removed
The tray is set in motion with the help of a motor, which communicates with the mechanics with a rubber strap (strap). You need to remove the strap carefully so as not to stretch it. The mechanical operation of the drive tray depends on the condition of the drive. By the way, the tray often has problems after a long (more than two years) operation without maintenance. First, dust is accumulated in the guides and the tray does not get to the extreme position because of this, and then the belt is stretched due to the fact that the drive mechanism cannot open the tray due to the incorrect position of the tray.
rubber belt
Following the belt, remove the mechanics control board (1 or 2 latches). Care should also be taken not to damage the motor control cable coming from the main board. On low-cost models, the cables may well be fragile or poorly soldered. We remove dust from the mechanics with a soft brush or air on both sides (top and bottom). Ideally, it is advisable to go through the entire DVD drive with a brush first and then blow it with air (for example, using a rubber bulb, which is sold in any pharmacy).
dismantling the control board
After all the dust from the drive housing is removed, the rubber parts are degreased with alcohol and the old grease is removed from the guides (usually at the time of maintenance there is a mixture of fine dust and dirt with a small amount of grease remaining).
degreasing rubber parts
In conclusion, the moving rubbing mechanical parts are lubricated with a small (scanty) amount of lubricant in order to only form a film (no longer desirable). There should be no visible accumulation of grease.
guide lubrication
drive chassis lubrication
The final touch is the blowing (only with a rubber bulb) of the lens of the laser mechanism (it is impossible to wipe it in any case) and the drive is going back.
When assembling, it is necessary to check the progress of the tray without a dust cover, with it, closing with a finger and the progress of the tray with the disc. Especially if there were problems with it before cleaning the DVD-drive. In the final article, a video of a successful bulkhead of a problematic drive with an idle tray.